Phones
Phone numbers are the foundation of your Tonet system. Each number gets its own routing, schedule, recording settings, and permissions. You can buy local or toll-free numbers, port your existing numbers, and configure exactly how calls flow through your business.
Go to Manage > Phones to see all your phone numbers.
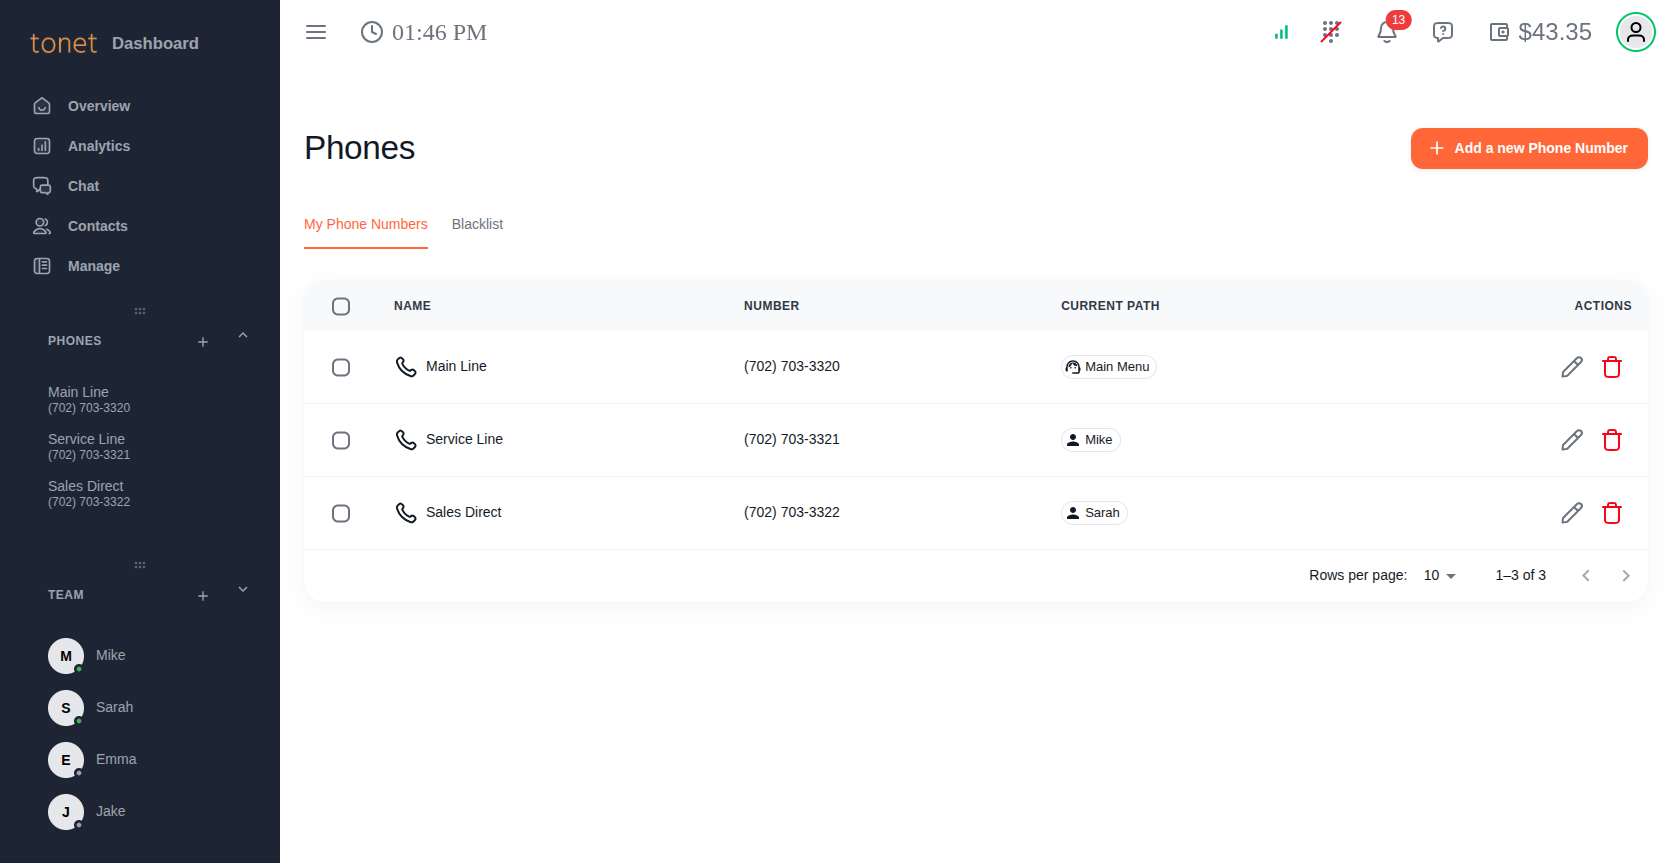
The page has three tabs:
- My Phone Numbers - Your active numbers and their current routing (this page)
- Verified Caller ID - External numbers verified for use as outbound caller ID
- Blacklist - Numbers blocked from calling you
My Phone Numbers
The table shows all your active phone numbers:
- Name - Your label for the number (e.g. "Main Line", "Sales Direct")
- Number - The phone number
- Current Path - Where calls are being routed right now. This updates dynamically based on your schedule, calendar, and default routing. For example, during business hours it might show "Main Menu" (your auto attendant), and after hours it might show "Busy".
- Actions - Edit (pencil icon) and delete (trash icon)
Purchasing a New Number
Click + Add a new Phone Number in the top right corner.

- Number Type - Choose Local Number or Toll Free
- Area Code - Enter a 3-digit area code (e.g. 702 for Las Vegas, 212 for New York) and click Search
- Select Numbers - Click the numbers you want. Selected numbers are highlighted in orange. Click again to deselect. You can select as many as you need.
- Click Purchase to add them to your account
Numbers are available immediately. After purchasing, configure the number's routing, permissions, and recording from the edit page.
Make sure your account has enough balance to cover the purchase. Phone numbers are billed monthly from the date of purchase. To remove a number, click the delete icon on the phone list.
If you want to keep using your existing business number instead, you can port it to Tonet.
Configuring a Phone Number
Click the edit icon (pencil) on any phone number to open its configuration. The edit page has two tabs: Configure and Permissions.
Configure Tab
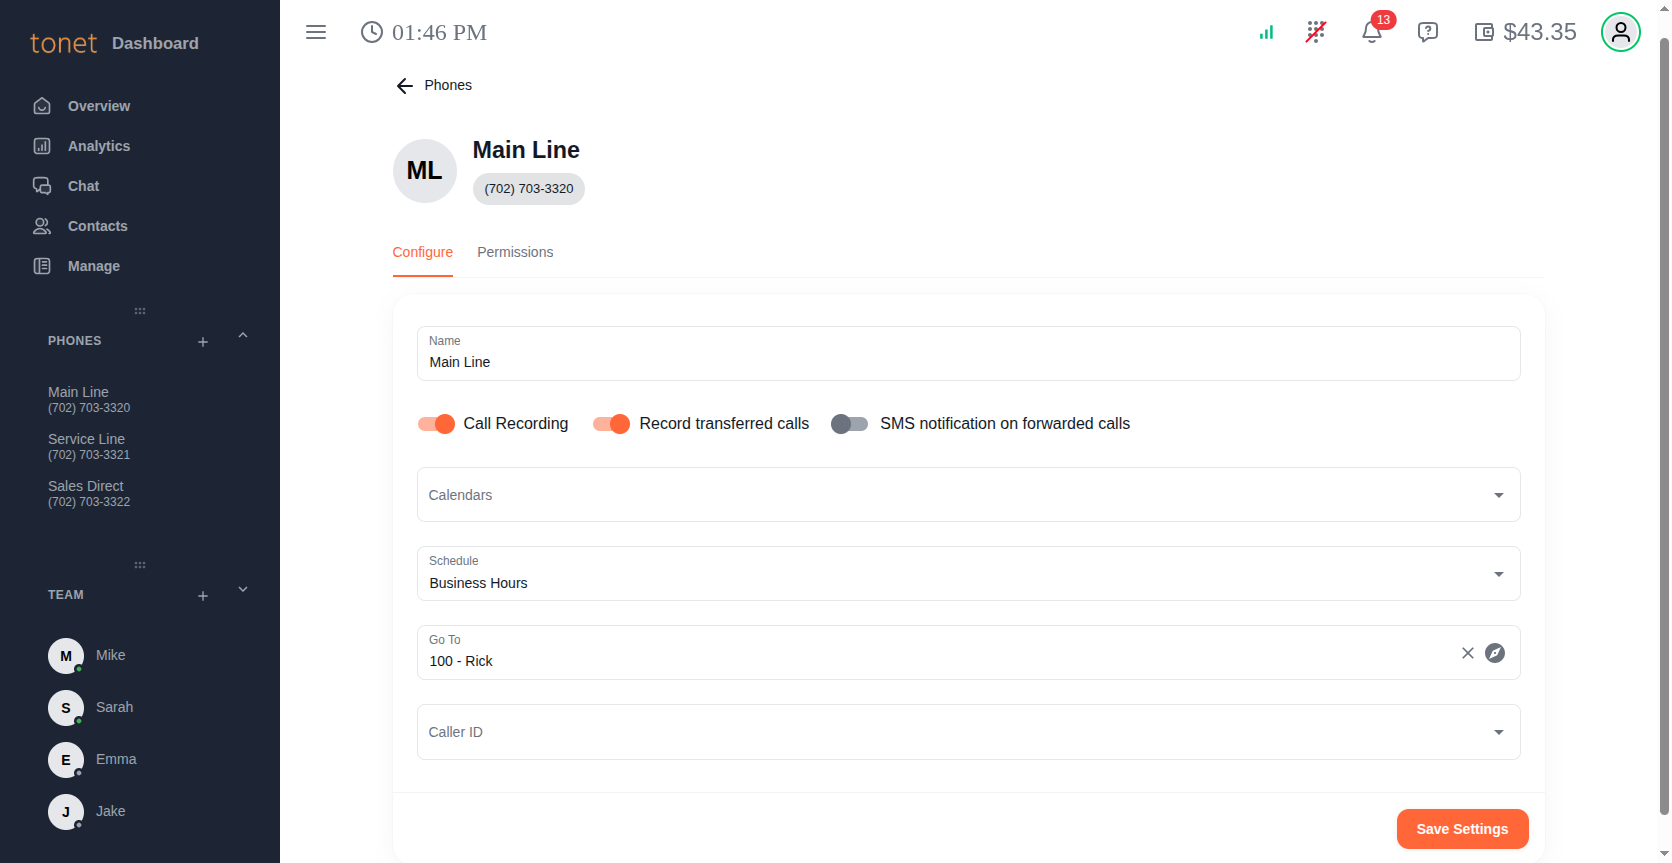
-
Name - A friendly label for this number. This is what your team sees in the sidebar and call logs (e.g. "Main Line", "Sales Direct", "Support").
-
Call Recording - When enabled, all calls on this number are recorded. Recordings are accessible in Analytics > Call History. Tonet stores recordings for the number of days set in your account settings (default 90 days).
-
Record transferred calls - Also records calls after they're transferred to another extension. Without this, only the initial call segment is recorded.
-
SMS notification on forwarded calls - Sends a text message to the assigned user when a call is forwarded to them, so they know who's calling before the phone rings.
-
Calendars - Select calendar entries that override normal routing. For example, if you add your "Christmas Week" calendar entry here, calls will route to the calendar's destination (usually Busy/voicemail) during that date range, regardless of schedule. You can add multiple calendar entries to a single number.
If two calendar entries overlap and both are assigned to the same phone, the number will route to the first matching calendar it finds. Avoid overlapping calendars on the same number.
-
Schedule - Assign a schedule for time-based routing. For example, "Business Hours" might route calls to your auto attendant Monday-Friday 8 AM - 5 PM, and to voicemail after hours. You can only have one schedule per phone number.
-
Go To - The default destination when no schedule or calendar applies. Click the pencil icon to open the route picker and choose where calls go.
-
Caller ID - Sets the outbound caller ID for calls made from this number. You can select any number on your account, or a number you've verified. If you want to display an external number that isn't on your Tonet account, you must verify it first.
Click Save Settings when done.
Call Routing Priority
When a call comes in, Tonet checks routing in this order:
- Calendar - If a calendar entry matches the current date and time, route to its destination
- Schedule - If a schedule rule matches the current day and time, route to its destination
- Go To (Default) - If nothing else matches, route to the default destination
You can see where each number is currently routing in the Current Path column on the phone list.
Route Picker
The route picker appears whenever you need to choose a call destination - on the phone's Go To field, in schedule routes, auto attendant key assignments, and calendar entries.
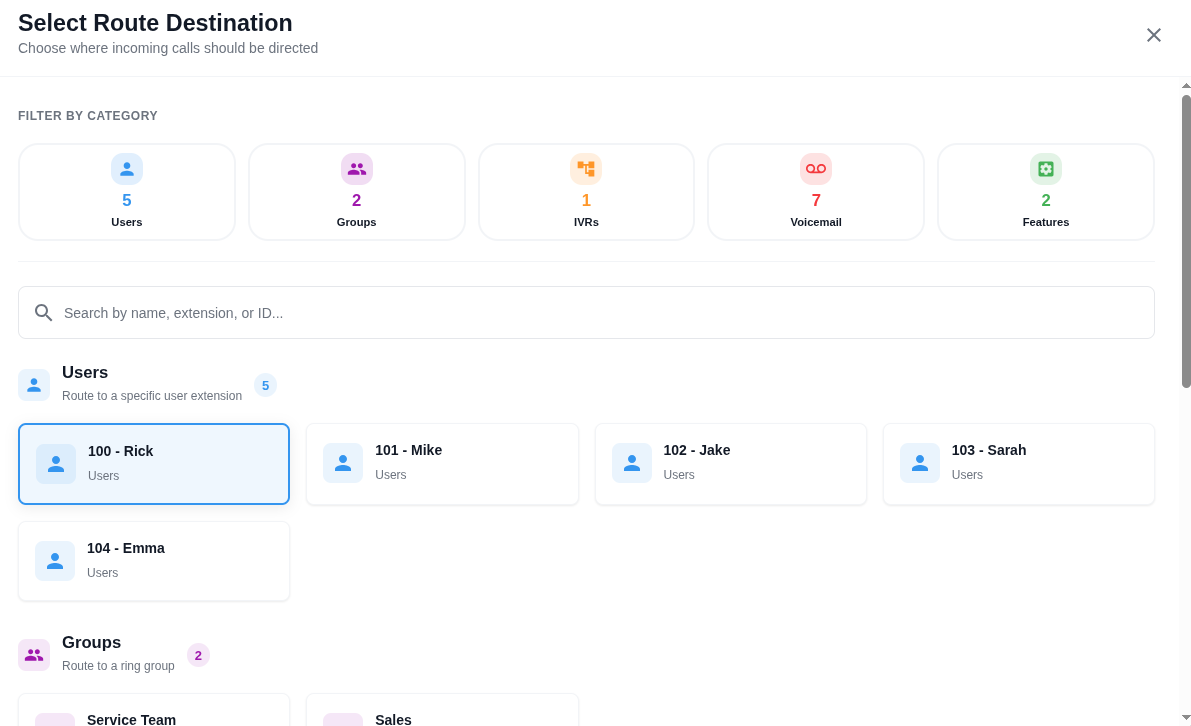
Filter by category across the top:
- Users - Route to a specific team member's extension. The call rings their devices.
- Groups - Route to a ring group. The call rings all members of the group (or queues if call queue is enabled).
- IVRs - Route to an auto attendant menu ("Press 1 for Sales, 2 for Service...").
- Voicemail - Send the caller directly to a user's or group's voicemail box.
- Features - Special destinations like Busy (play busy tone) or an external phone number for call forwarding.
Use the search bar to quickly find a destination by name, extension, or ID.
Permissions Tab
The Permissions tab controls which team members can use this phone number for outbound calls and SMS.
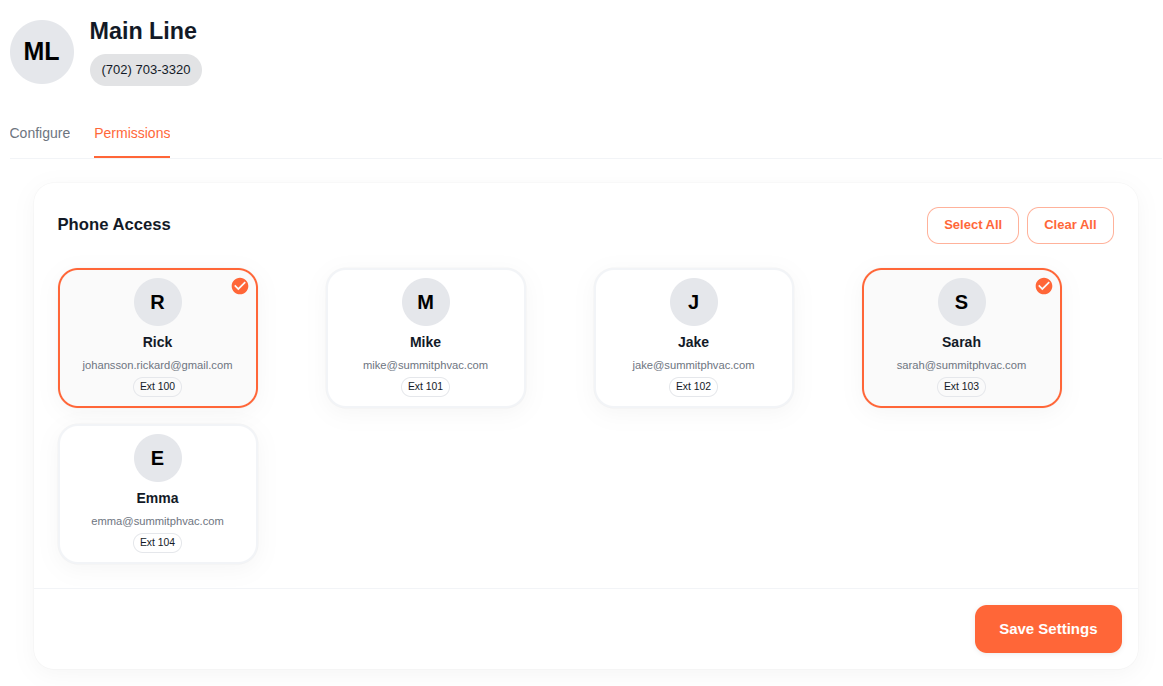
Each user appears as a card. Click a card to toggle access - selected users (highlighted with an orange border and checkmark) can use this number. Use Select All or Clear All for bulk changes.
When a user has permission on a phone number, they can:
- Make outbound calls using this number as their caller ID
- Send SMS from this number (requires 10DLC registration for the number)
Users without permission won't see this number in their dialpad or SMS composer. This is how you control which team members use which lines - for example, only your sales team should have access to the Sales Direct number.
Permissions only affect outbound calls and SMS. Inbound call routing is controlled by the phone number's configuration - schedule, calendar, and Go To settings.
Click Save Settings to apply changes.